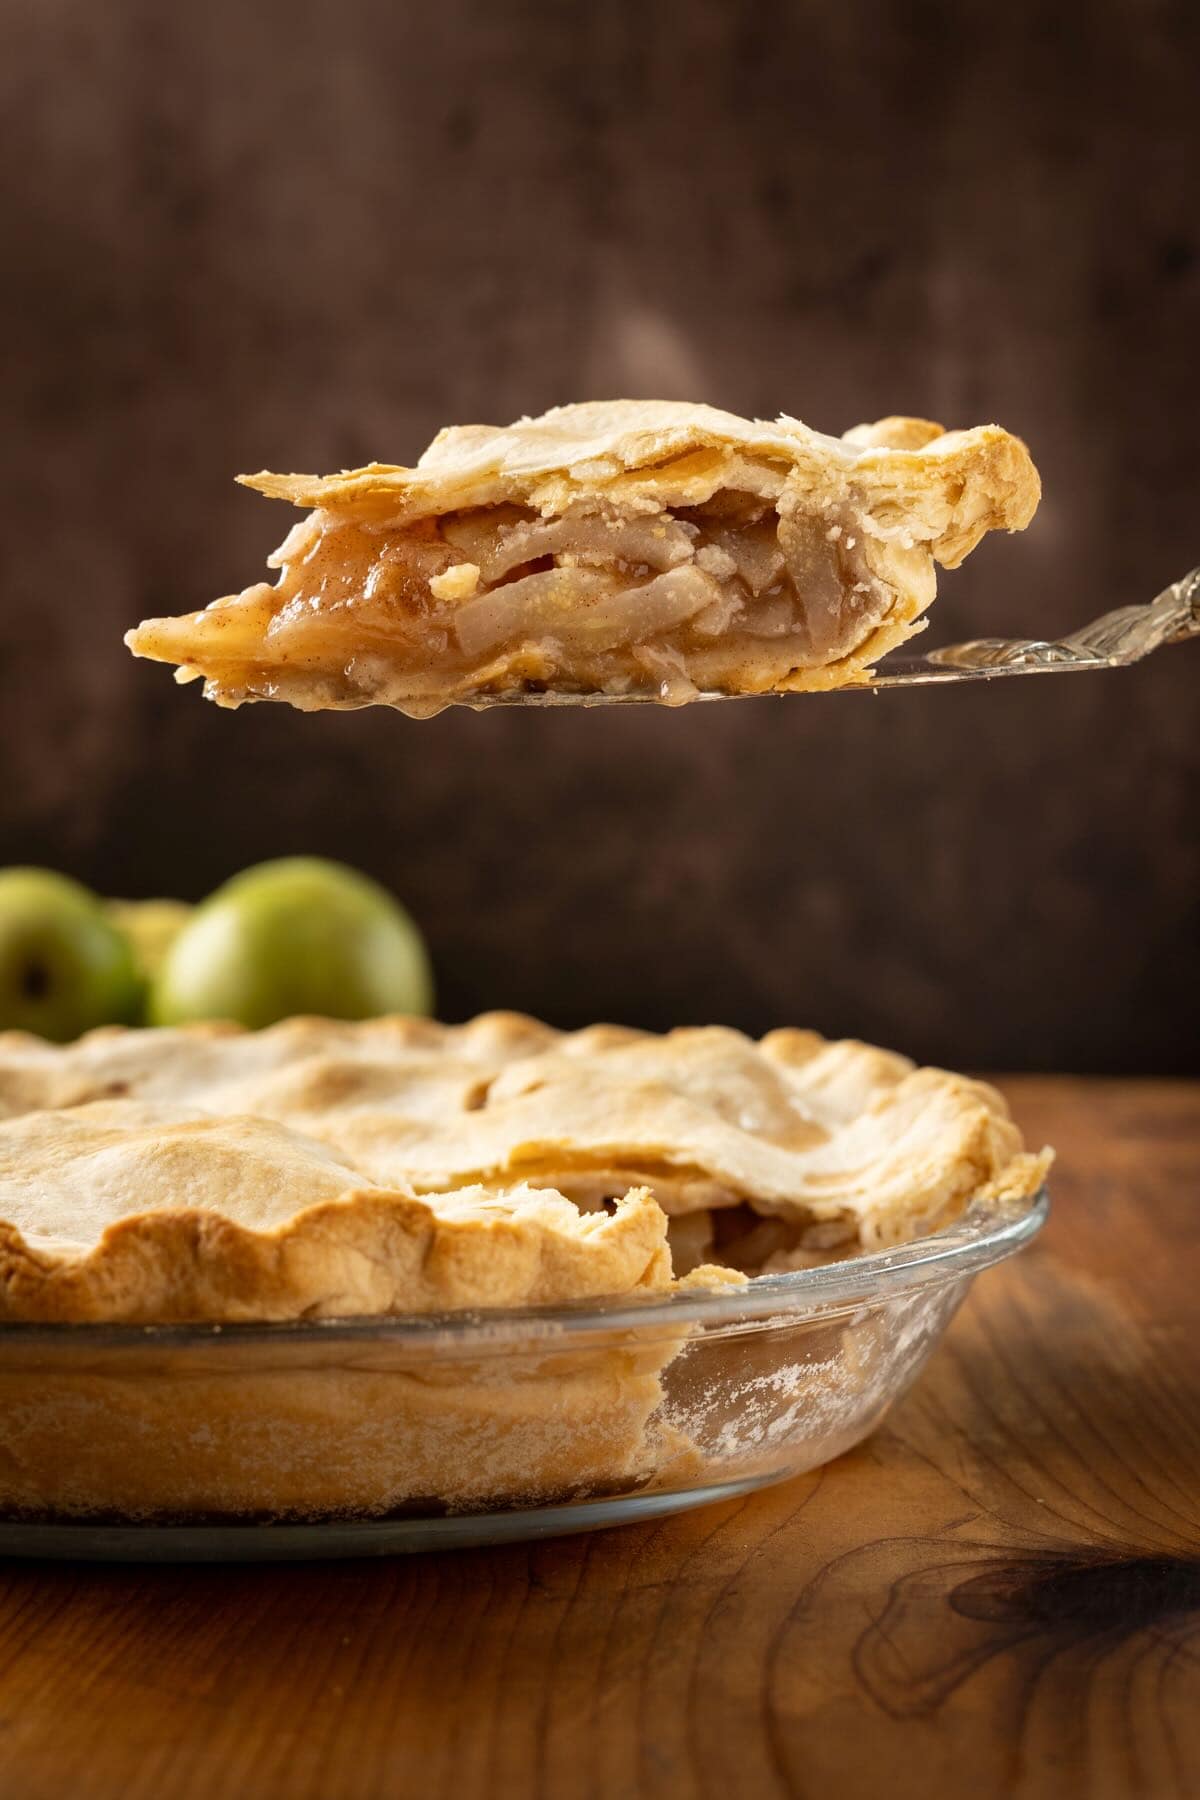
When life hands you pears, make pie! This Easy Pear Pie with Fresh Pears brings that old-fashioned flavor home with simple steps and modern-day ease.
With tender slices of pear, a buttery double crust, and cozy cinnamon spice, this homemade pear pie delivers that old-fashioned flavor you remember, without any fussy steps or fancy ingredients.
Southern Comfort with a Side of Simplicity
A Quick Look at the Recipe
- Servings: 8
- Prep time: 15 minutes
- Bake time: 45 minutes
- Total time: About 3 hours (including cooling)
- Difficulty: Easy
- Perfect for: Thanksgiving, Christmas, potlucks, or when someone drops off a bag of backyard pears
Jump to:
- A Quick Look at the Recipe
- Why You'll Love this Recipe
- Main Ingredient Notes and Smart Swaps
- Fun Twists and Tasty variations
- How to make Pear Pie with Fresh Pears (step-by-step)
- Serving Ideas
- Shortcut to Supper (time-saving tips)
- Supper and Then Some (Reimagining Leftovers)
- Make it Ahead (Plan and Prep Tips)
- Recipe FAQs
- Pro Tips for Perfect Results
- More Southern Dessert Recipes You'll Love
- Bringing It all Together
- Easy Pear Pie with Fresh Pears (Old-Fashioned Flavor Made Simple)
Why You'll Love this Recipe
This recipe celebrates the simple charm of Southern fruit pies - rustic, fragrant, and just sweet enough to let the fruit shine. You'll love it because:
- It uses fresh pears for pure, natural flavor; no canned fruit here.
- It's easy enough for beginners but impressive enough for guests.
- It's versatile; use your favorite pear variety, add warm spices, or top with a crumb crust.
- The aroma alone will make your kitchen smell like fall at Grandma's house.
Main Ingredient Notes and Smart Swaps
Let's talk ingredients: what you need, what you can swap, and how to make it work with what's in your pantry. The following are the main ingredients; measurements are provided in the recipe card below.
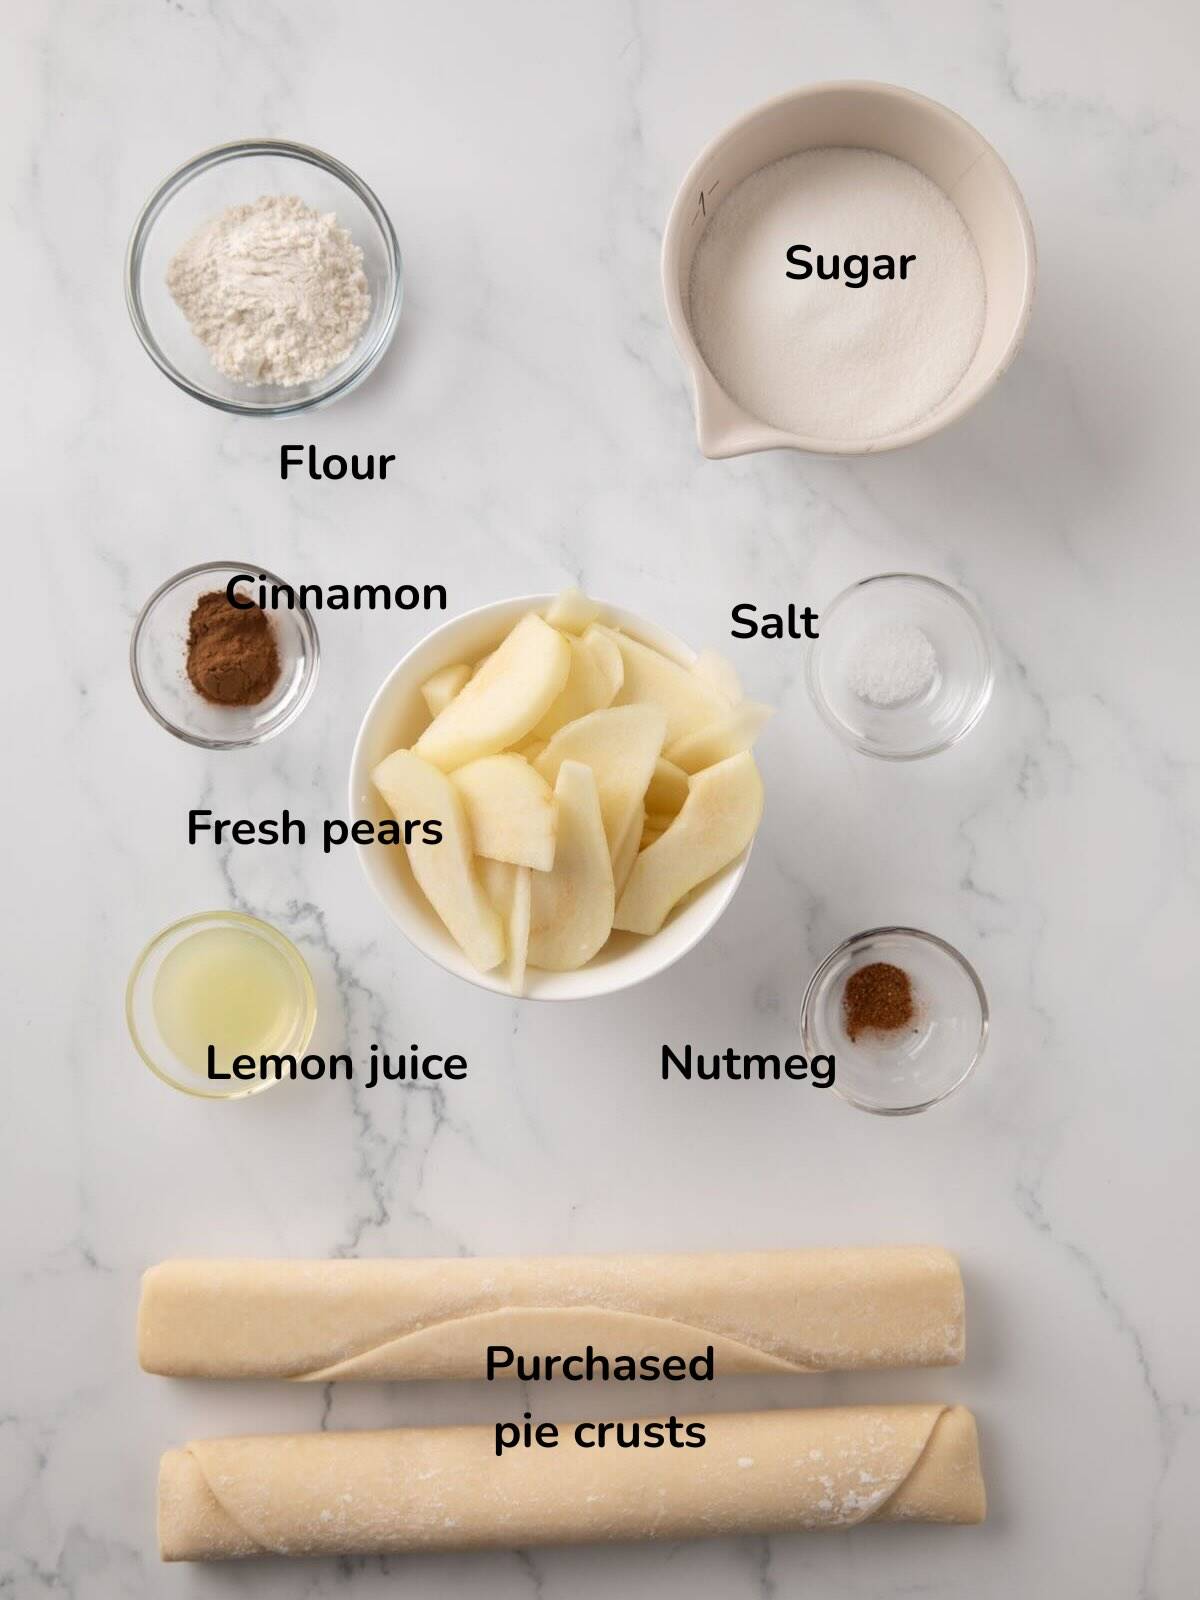
- Pears: Fresh pears are the star of this pie. Choose firm, just-ripe pears, such as Bartlett, Anjou, or Bosc, for the best texture-they hold their shape beautifully as they bake. If you're lucky enough to have Florida Sand Pears or another local backyard variety, use those! Avoid overly ripe pears, as they can release too much liquid, making the pie runny.
- Sugar: White granulated sugar keeps the flavor classic and lets the pears shine. For a richer, caramel-like sweetness, substitute part of the sugar with light brown sugar.
- Flour: A touch of flour thickens the pear filling and helps it set nicely once cooled. You can use cornstarch instead if you prefer a clearer filling or if your pears are especially juicy.
- Spices: Cinnamon and nutmeg are the classic duo that make this pie smell heavenly. Add a pinch of ground ginger, cardamom, or even allspice if you want a little extra warmth or spice depth.
- Lemon juice: Don't skip this small but mighty ingredient-it brightens the flavor and keeps those pretty pear slices from turning brown. Fresh-squeezed is best, but bottled works fine too.
- Pie crust: A flaky, buttery crust ties everything together. A store-bought refrigerated or frozen crust is a great time-saver and bakes up beautifully golden, but if you have a homemade crust recipe you love, by all means use it.
- Butter: Small cubes of butter dotted over the filling melt into the fruit as it bakes, adding richness and that luscious, syrupy texture we all love.
Fun Twists and Tasty variations
- Pear-Apple Pie: Use half pears and half tart apples for a fruity mix.
- Crumb-Topped Pear Pie: Replace the top crust with a brown-sugar streusel.
- Bourbon Glaze: Brush a light bourbon-maple glaze over the cooled pie.
- Mini Hand Pies: Use a biscuit cutter to cut the dough into smaller rounds, put in muffin tin cups, add the filling, and a top crust for individual desserts.
- Spiced Pear Pie: Add a pinch of clove or cardamom for an extra-warm spice profile.
Pro Tip: If your pears are extra juicy, let them rest in a colander for 10 minutes before mixing with sugar and flour. It's the easiest way to keep your crust from getting soggy and your filling perfectly thick.
How to make Pear Pie with Fresh Pears (step-by-step)
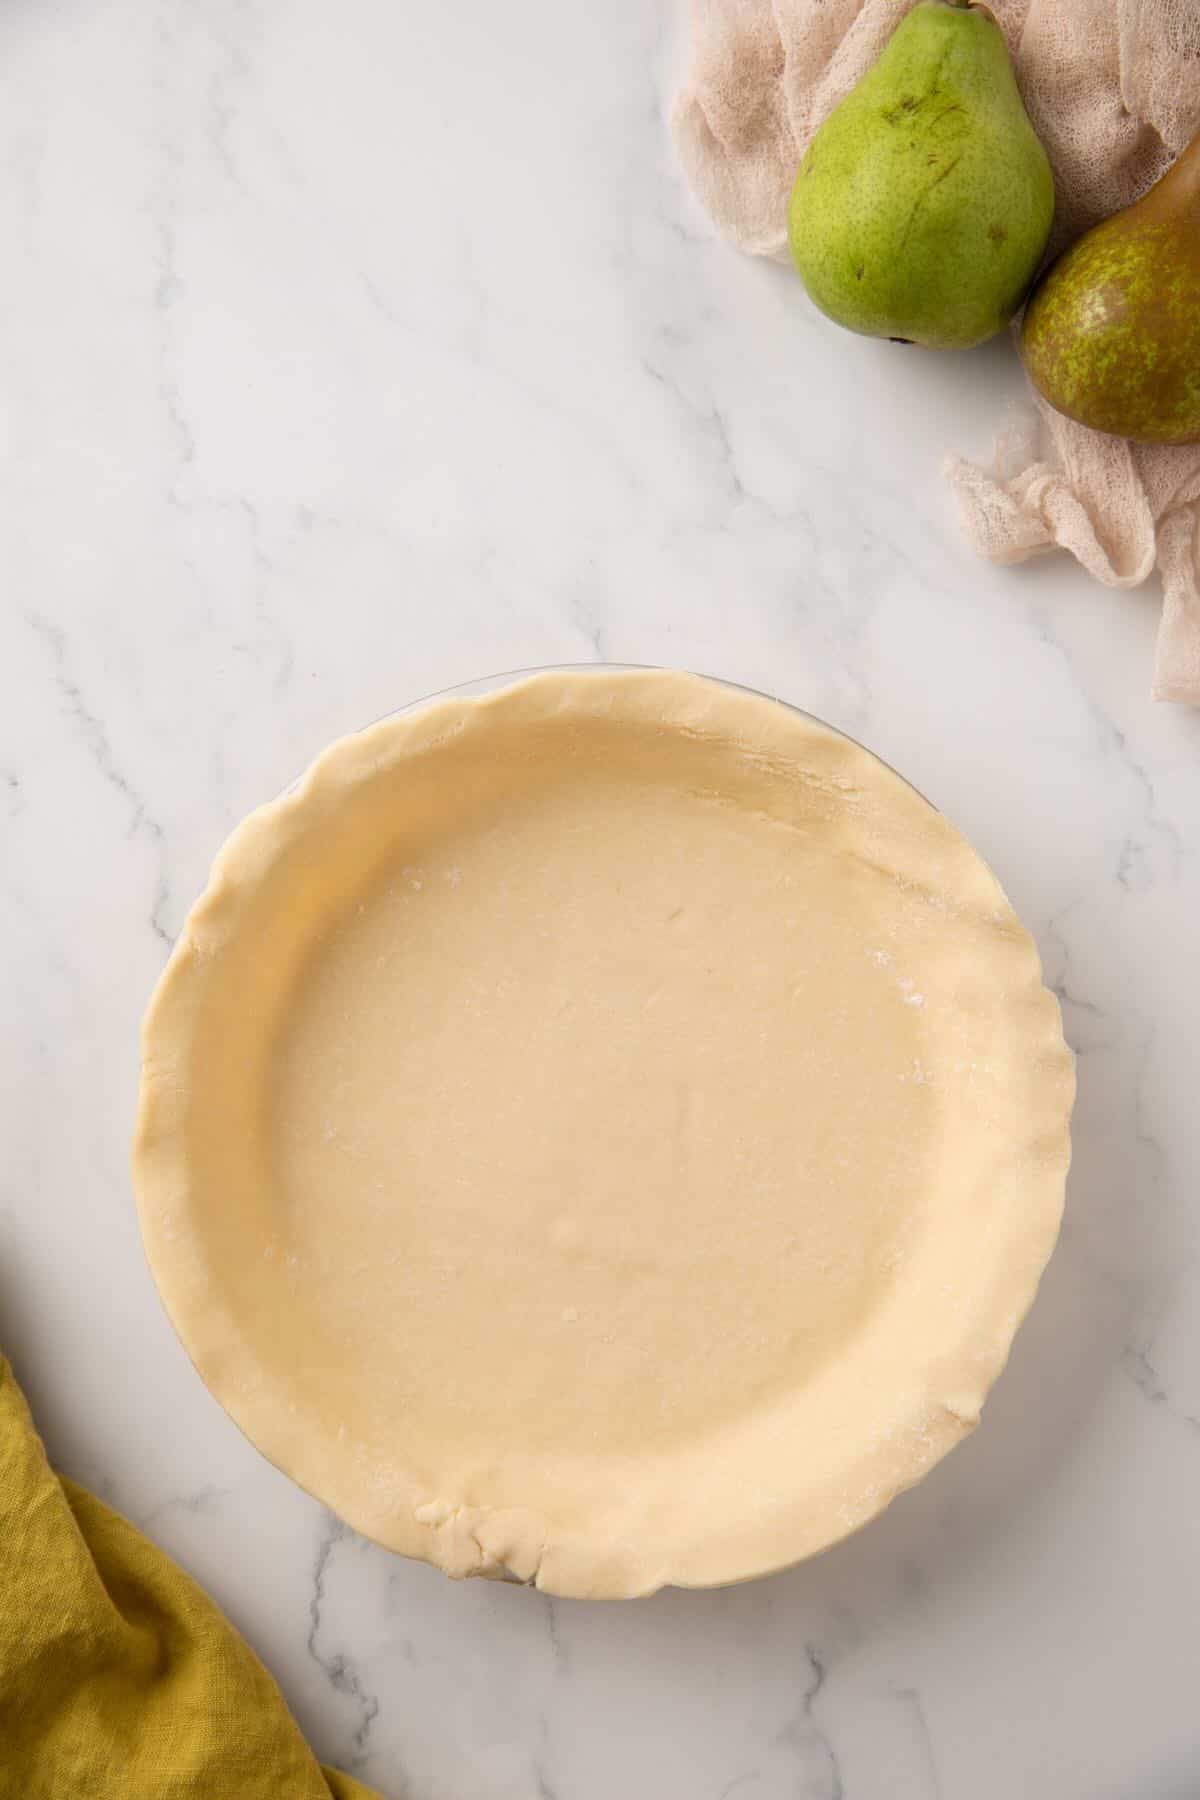
- Preheat oven to 425°F. Place one crust in a 9-inch pie dish, pressing it gently into the bottom and sides.
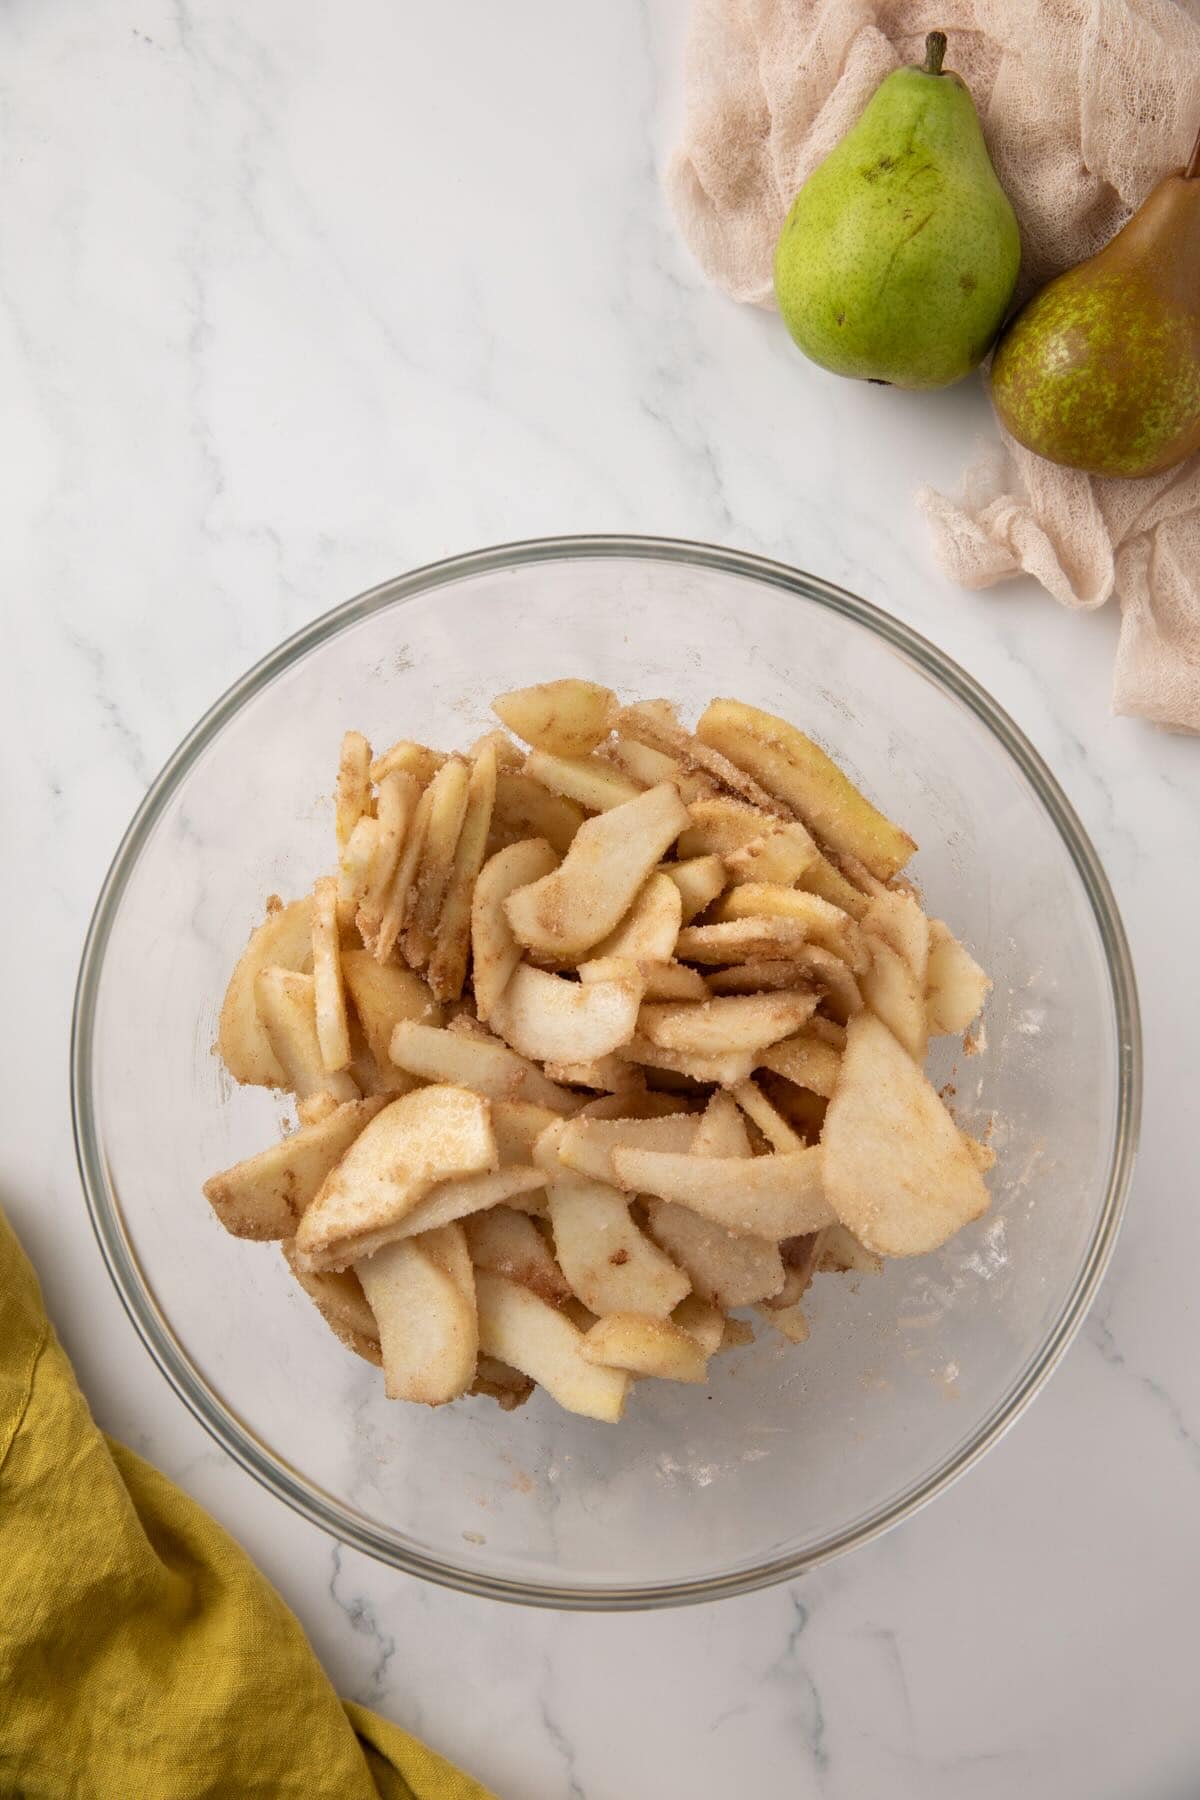
- Make the filling. In a large bowl, combine sliced pears, sugar, flour, cinnamon, nutmeg, salt, and lemon juice. Stir gently to coat.
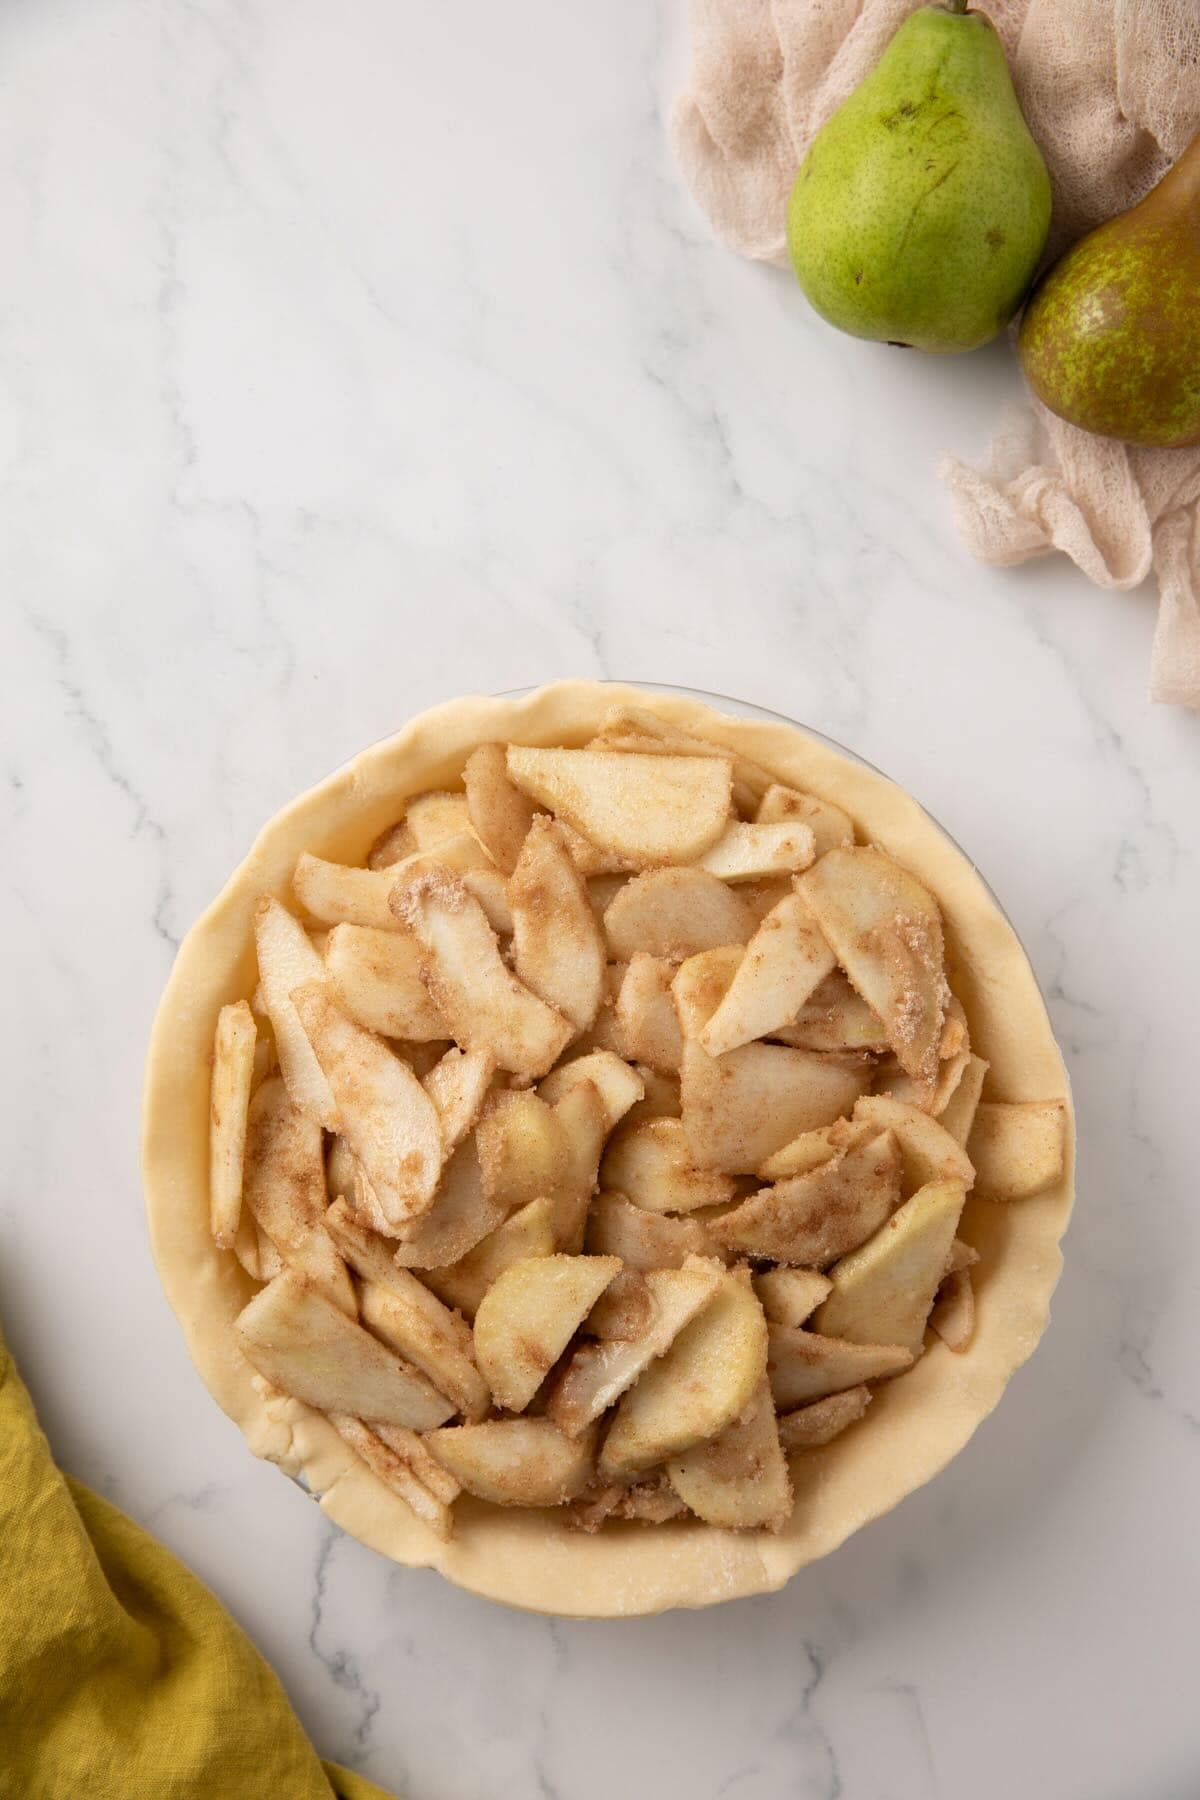
- Fill the crust. Pour the mixture into the prepared crust and spread evenly. Dot the top with small cubes of butter.
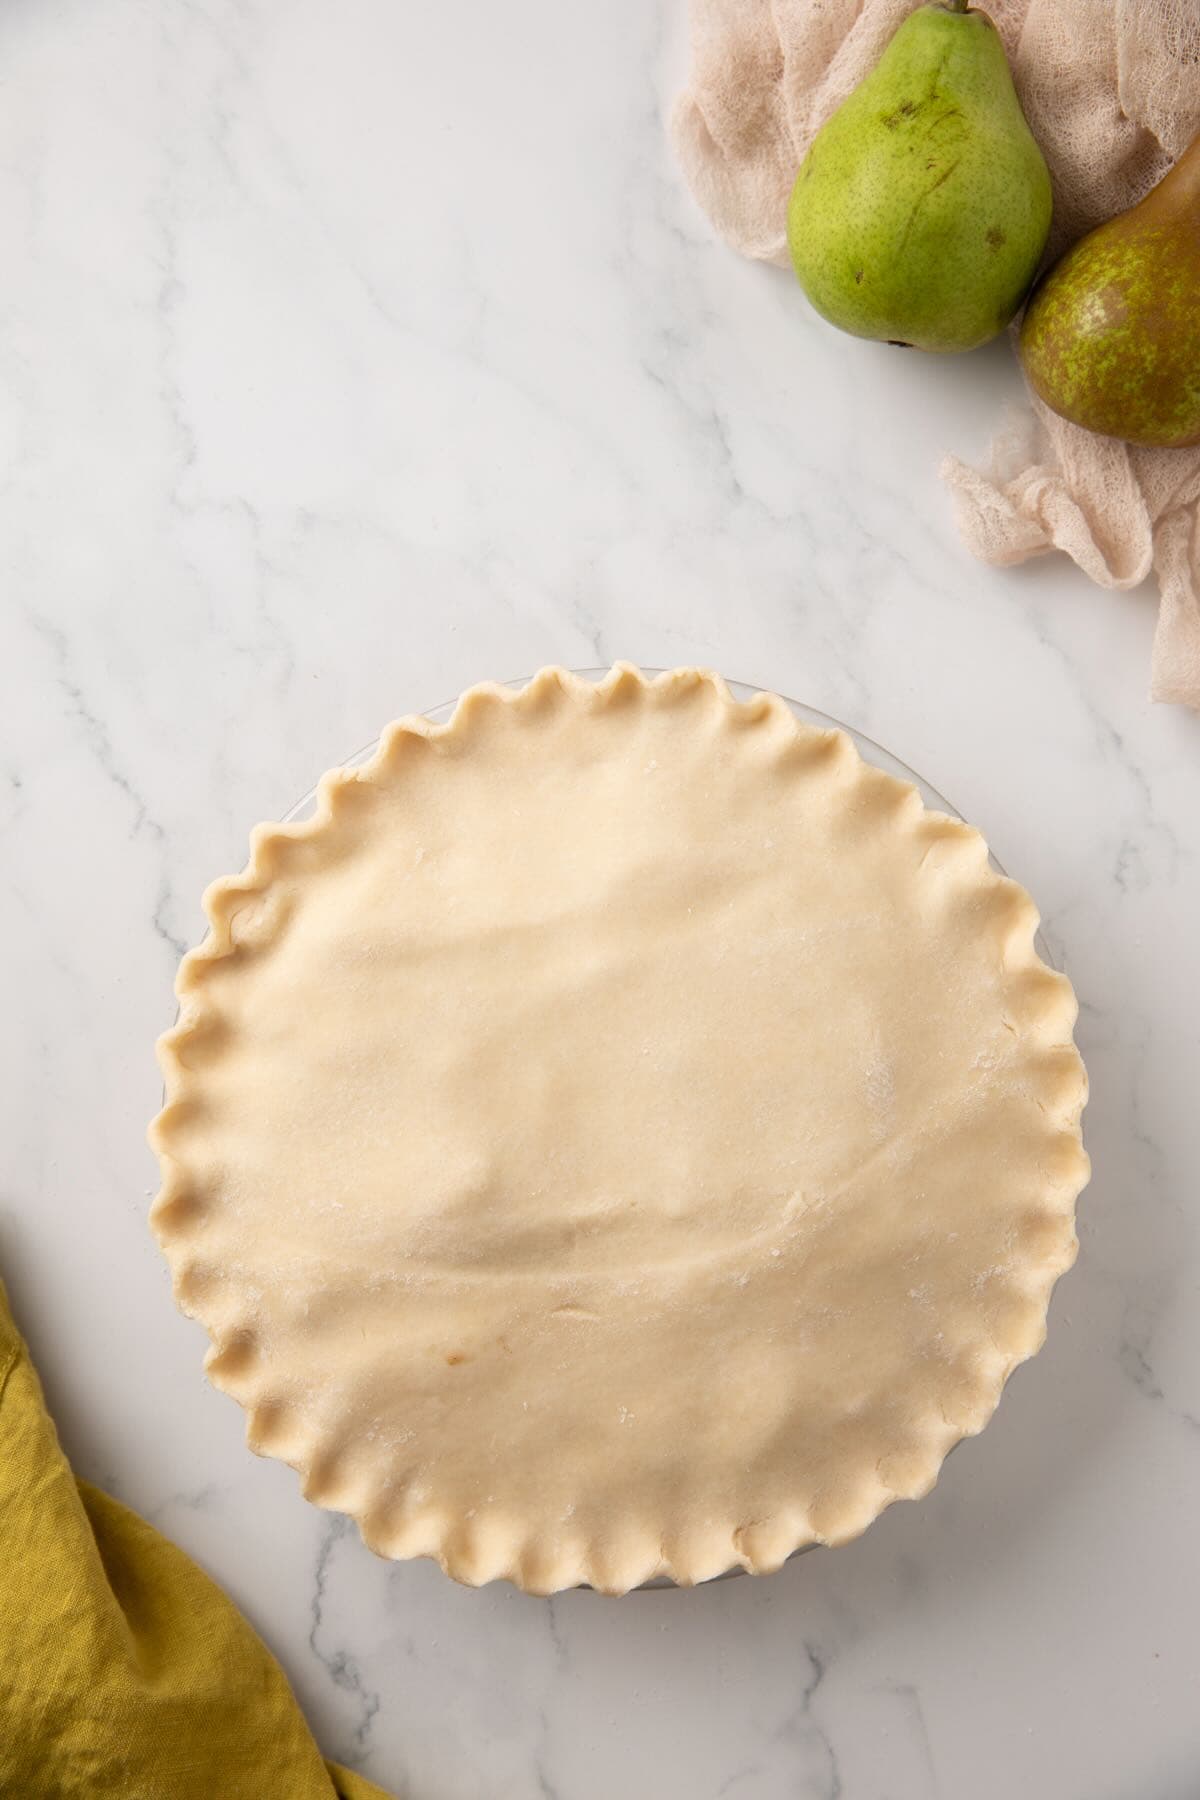
- Add the top crust. Place the second crust over the filling.
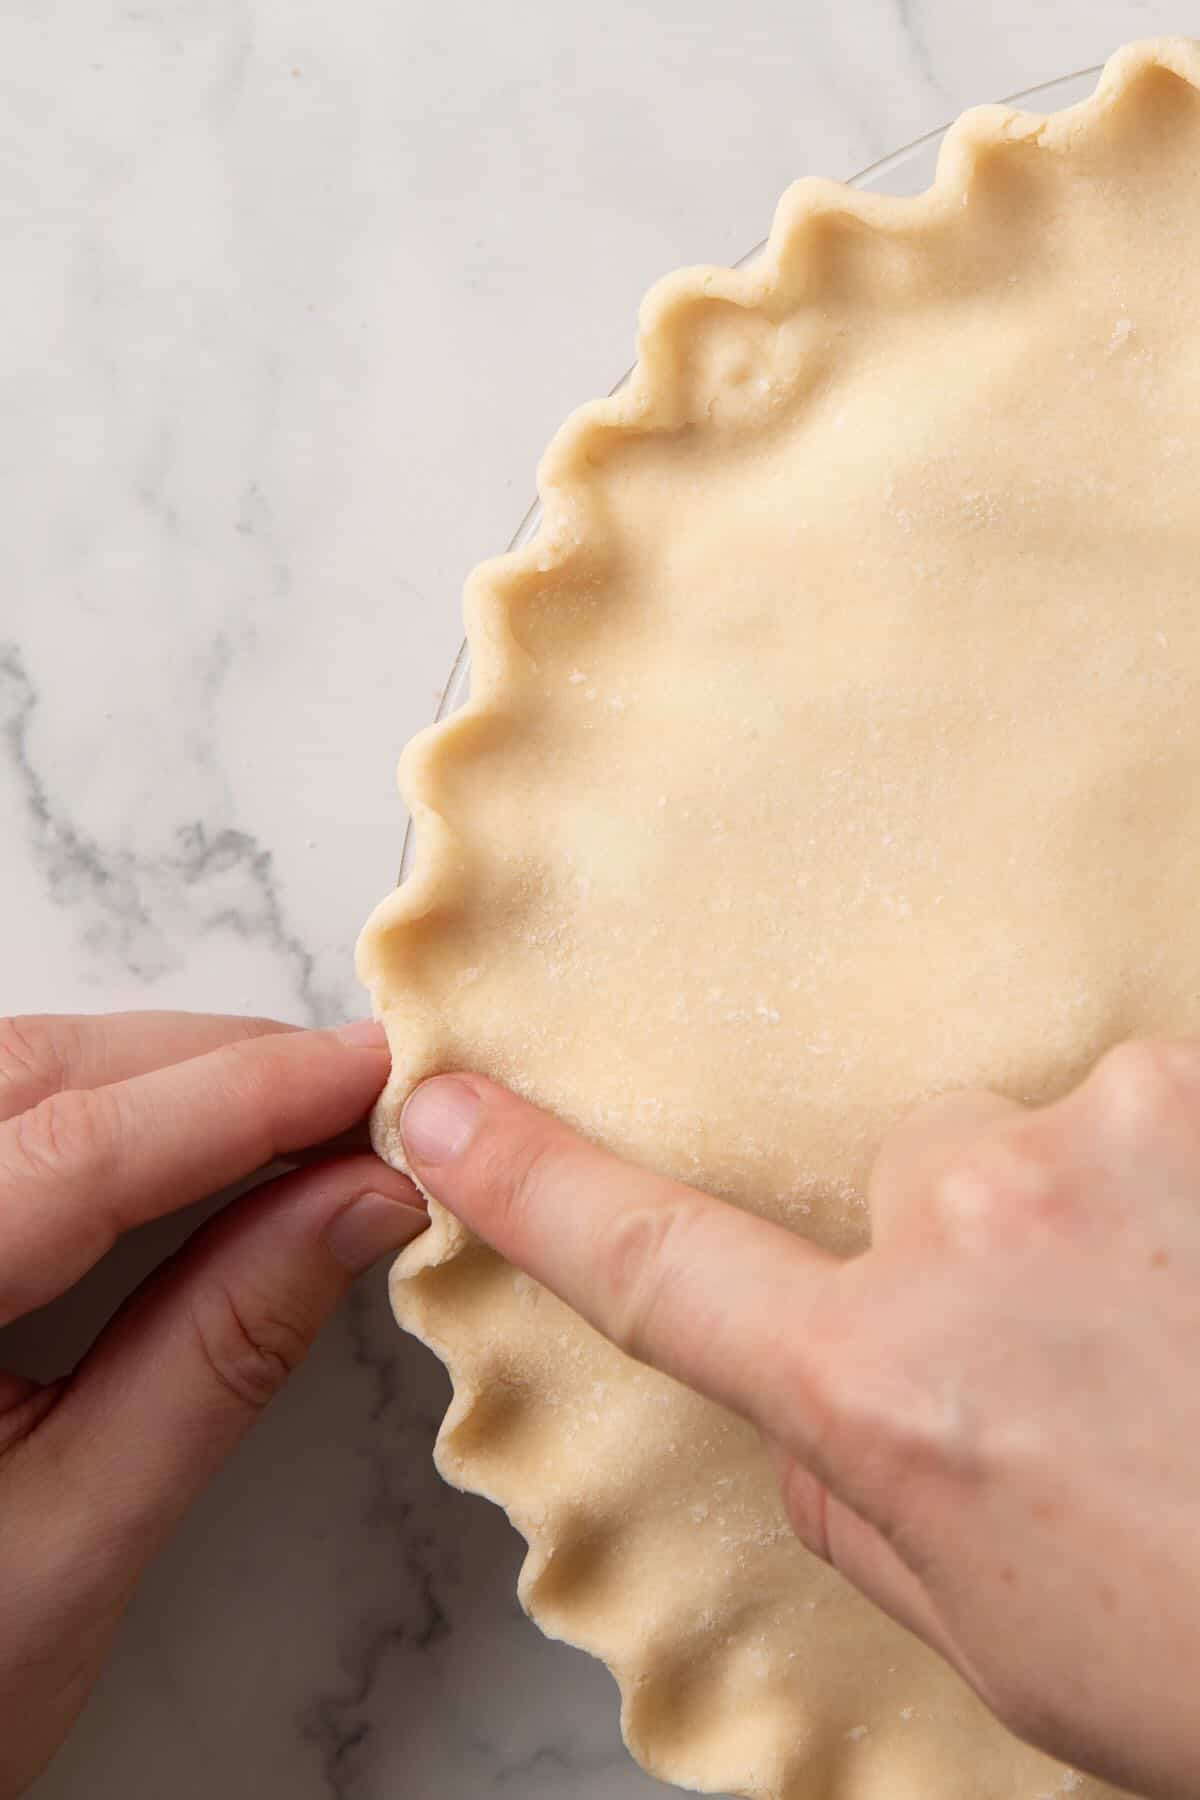
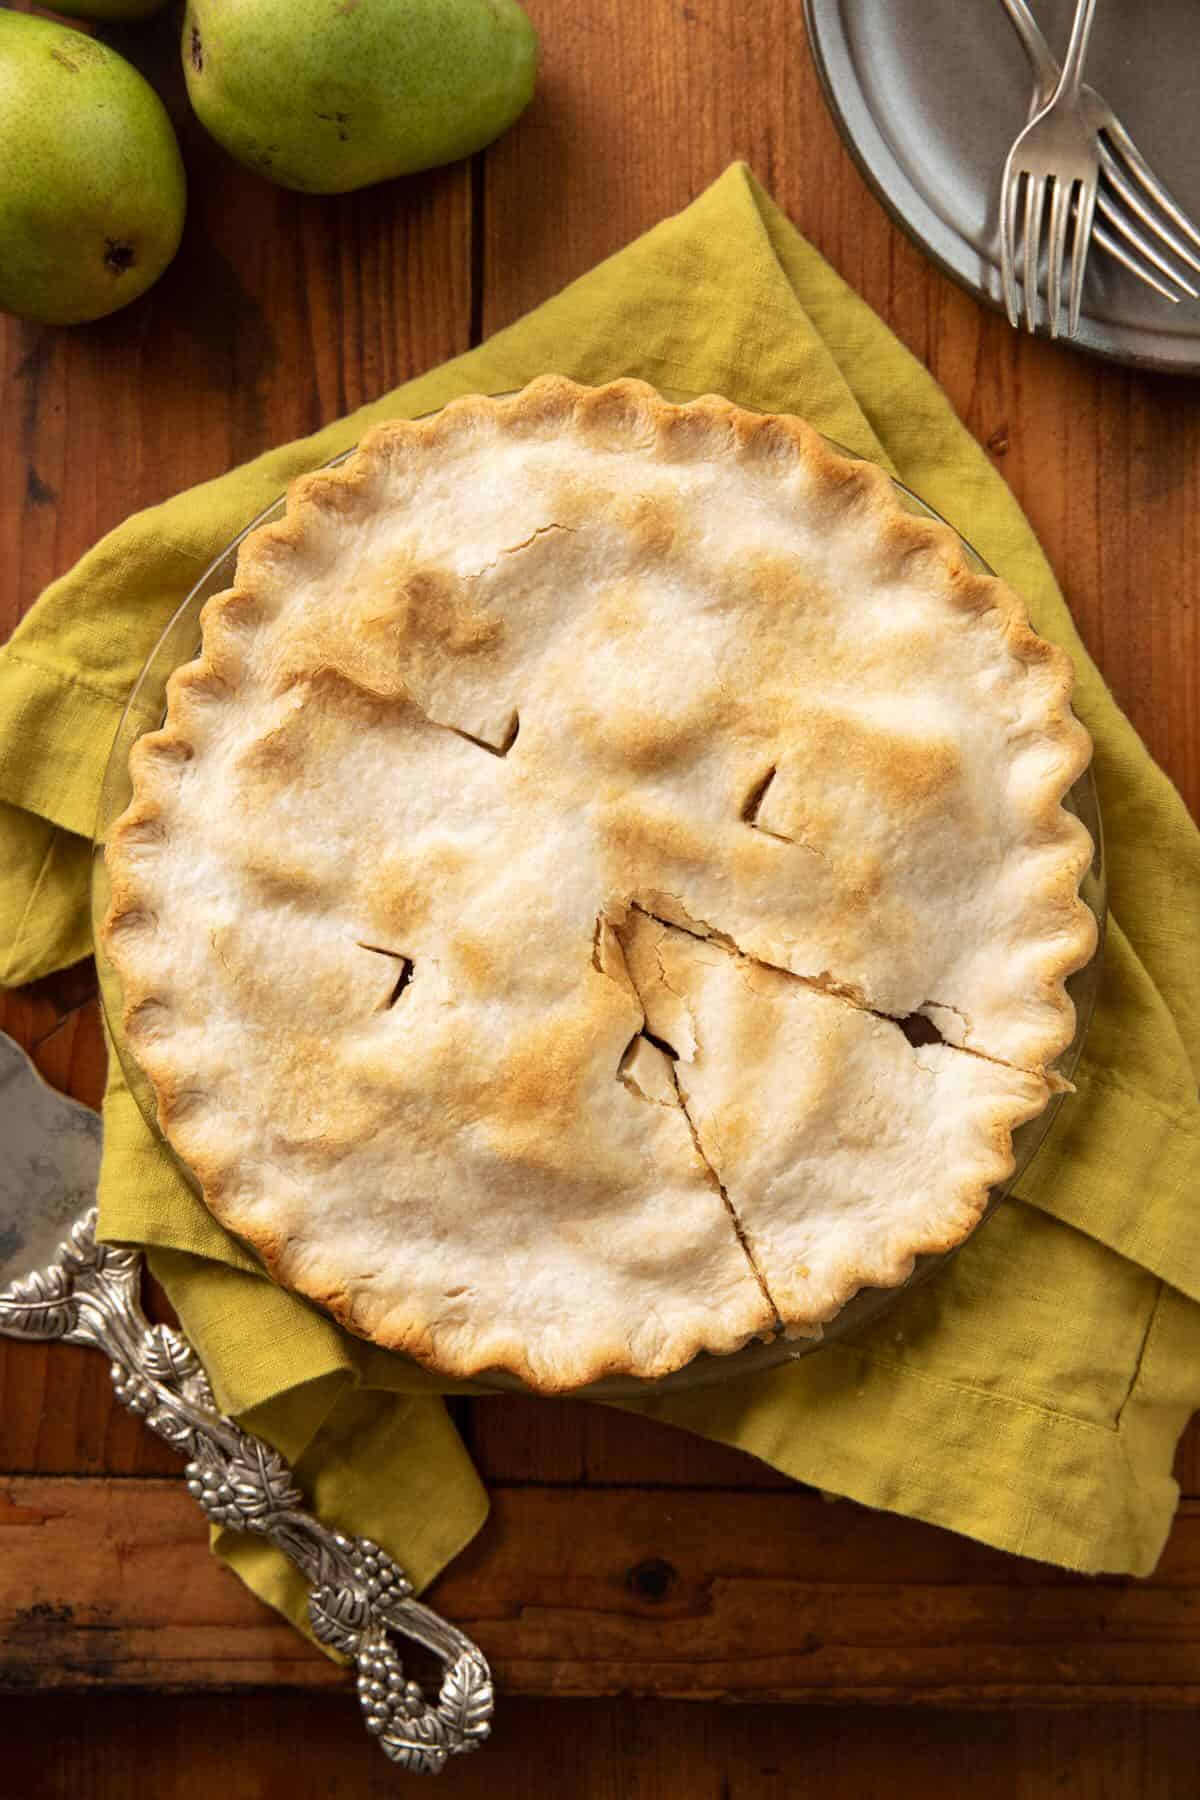
- Fold and crimp edges. Sealing them with your fingers or a fork. Cut a few slits in the top for steam to escape. Optional: For a shiny crust, brush the dough with an egg wash and sprinkle with coarse sugar before baking. See tips.
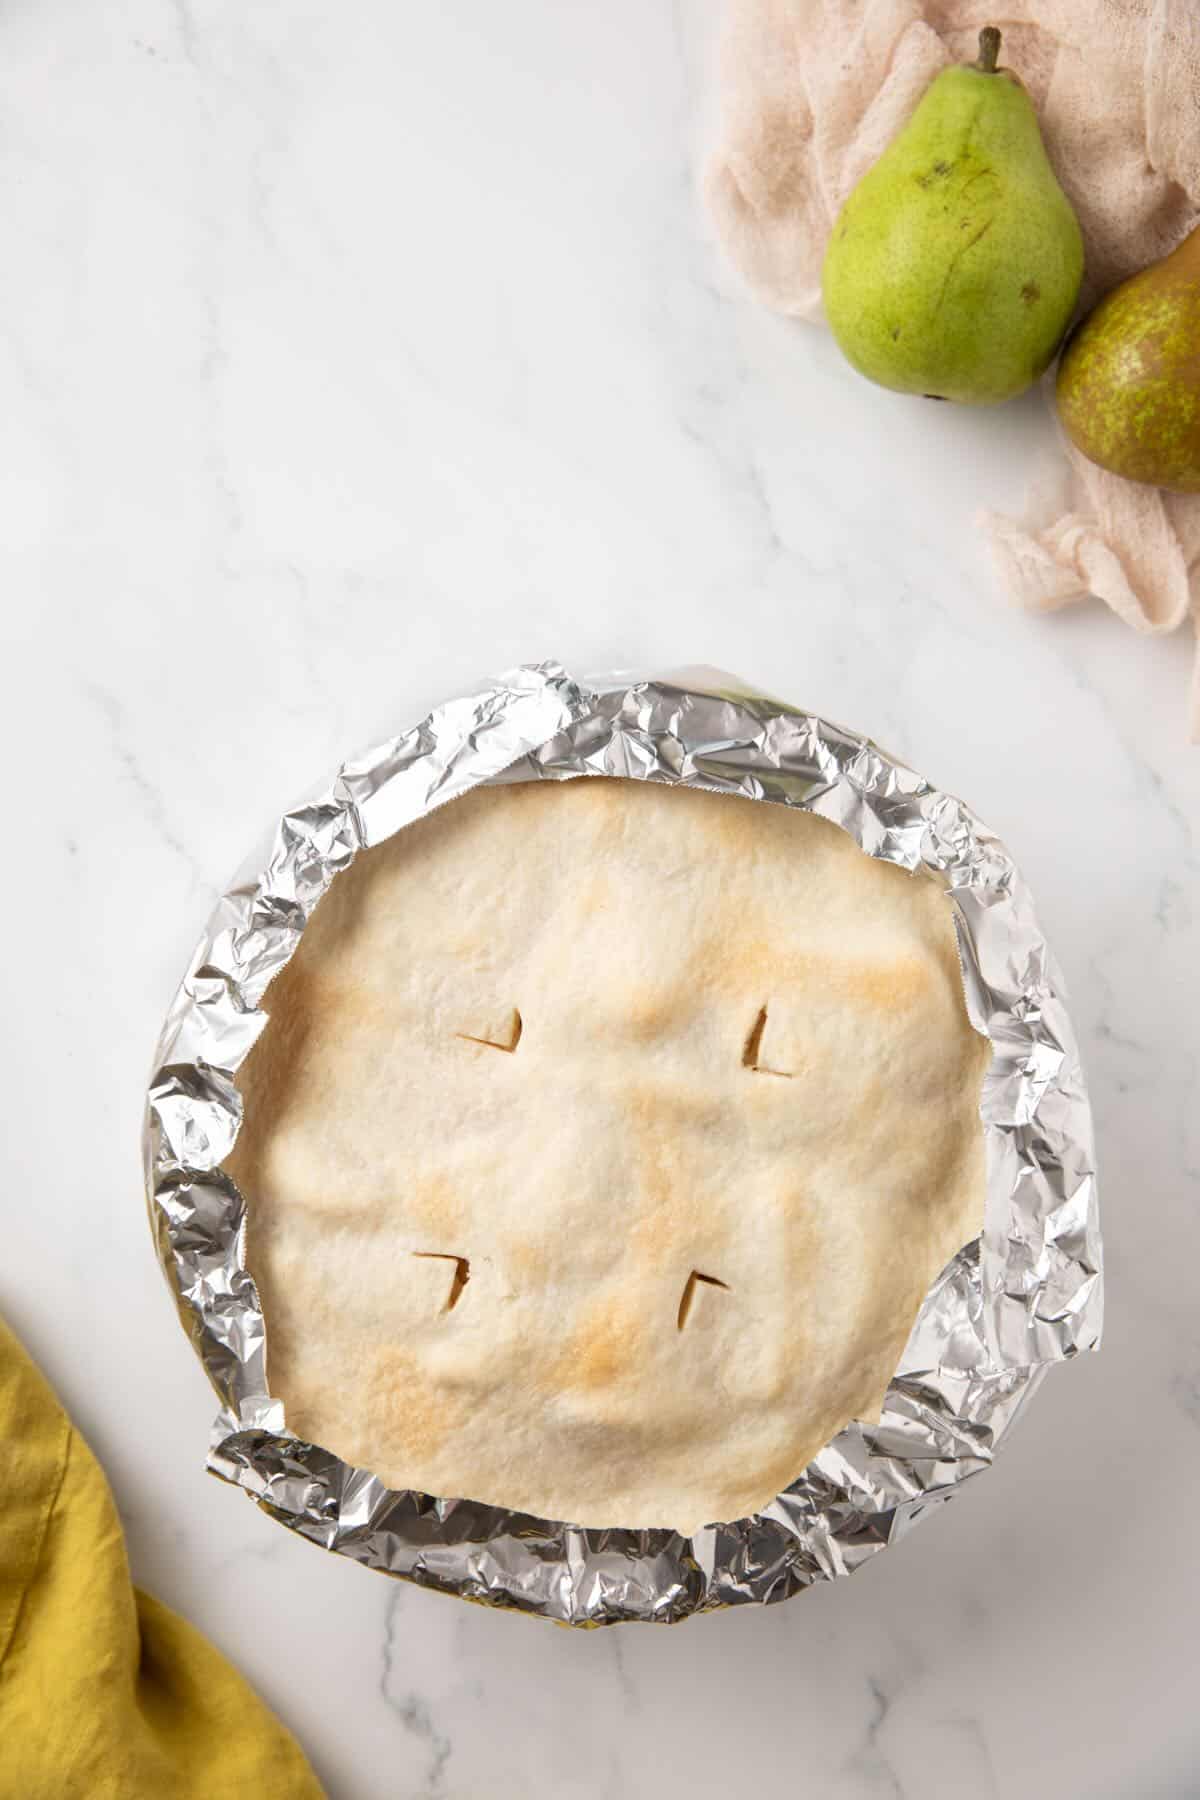
- Bake. Bake 20 minutes, then cover the edges with foil to prevent over-browning. Bake another 20-25 minutes, until the filling bubbles and the crust is golden brown.
- Cool and serve. Let the pie cool on a rack for at least 2 hours before slicing. This helps the filling set.
Serving Ideas
- On a Thanksgiving or other holiday dessert table, along with classic pecan pie and old-fashioned sweet potato pie.
- Warm slices with a scoop of vanilla ice cream or whipped cream.
- Drizzle with caramel or bourbon glaze for a Southern touch.
- Serve chilled with a cup of coffee for breakfast (my personal favorite).
- Nothing says "Southern Sunday supper" like finishing your meal with this pear pie alongside smothered country-style steak with onion gravy, creamy mushroom pork chops, or French onion chicken bake.
Shortcut to Supper (time-saving tips)
- Use store-bought refrigerated or frozen pie crusts - they bake up beautifully.
- Slice pears the night before and refrigerate in lemon water to prevent browning.
- Mix your dry ingredients in advance, so assembly takes just minutes.
- Chill your crust before baking - it keeps the edges crisp and flaky.
Supper and Then Some (Reimagining Leftovers)
Leftover pear pie is heavenly the next day:
- Warm a slice for breakfast with a drizzle of cream.
- Serve chilled alongside sharp cheddar cheese for a Southern snack.
- Crumble leftover crust and pie filling over yogurt for a quick parfait.
- Or, freeze individual slices and enjoy one cozy bite of fall anytime.
Make it Ahead (Plan and Prep Tips)
If you'd like to get a head start, this pear pie is easy to make in stages.
- Make the filling ahead: You can prepare the pear filling up to a day in advance. Store it covered in the refrigerator, then give it a gentle stir before adding it to your crust.
- Prep your crust early: Pie dough (homemade or store-bought) can be rolled out, fitted into the pie dish, and refrigerated (or even frozen) until you're ready to fill and bake.
- Freeze before baking: You can freeze the unbaked pie if you start with firm, just-ripe pears. Assemble the pie completely, skip the egg wash for now, and place it on a baking sheet to freeze until solid. Once frozen, wrap it tightly in plastic wrap and foil. When you're ready to bake, brush on the egg wash and bake the pie straight from frozen, no thawing needed. Just add about 15-20 minutes to the baking time.
- Texture note: Because pears hold more water than apples, the filling may be slightly softer after freezing, but it will still bake up juicy, fragrant, and full of flavor.
- Storing baked pie: Once baked, the pie will keep covered at room temperature for 1-2 days or refrigerated up to 5 days. You can also freeze a fully baked and cooled pie for up to 3 months; thaw overnight in the refrigerator before serving.
Recipe FAQs
Bosc, Bartlett, and Anjou pears are my top picks because they hold their shape beautifully as they bake. If you have access to Florida Sand Pears or another local backyard variety, even better! Avoid overly ripe pears, which release too much liquid and can make the filling runny.
Your pears may have been too ripe, or the pie needed more thickener or a longer baking time. Always let the filling bubble before removing it from the oven - that's your sign it has set properly.
Yes! Drain them well and reduce the sugar slightly. The texture will be softer, but the flavor will still be delicious.
Absolutely, if you use firm, just-ripe pears, assemble the pie, freeze it until solid, then wrap tightly in plastic wrap and foil. Bake straight from frozen (no thawing required), and add approximately 15-20 minutes to your total baking time. The filling will be slightly softer than a fresh-baked pie, yet still wonderfully juicy and full of flavor. (See Make It Ahead above for complete details.)
Yes, baked pies freeze beautifully, too! Let the pie cool completely, then wrap it tightly in plastic wrap and foil. Freeze for up to 3 months. Thaw overnight in the refrigerator, then warm it uncovered in a 325°F oven for 20-30 minutes to crisp the crust and revive the fresh-baked aroma.
Both work wonderfully-it just depends on your schedule. Freezing before baking gives the best crust texture and that "just-baked" freshness when you're ready to serve. Freezing after baking is perfect for storing leftovers or saving time later. Either way, you'll have a golden, flaky crust and a sweet, fragrant filling every time.
Keep loosely covered at room temperature for up to 2 days or refrigerated up to 5. Reheat slices in a 300°F oven for 10-15 minutes or enjoy them cold straight from the fridge.
Pro Tips for Perfect Results
- Bake the pie on a rimmed baking sheet to catch drips and make cleanup easy.
- Let the pie cool completely before slicing for clean wedges and a set filling.
- Brush the top crust with an egg wash (one egg beaten with a tablespoon of milk) for shine.
- Sprinkle with coarse, sparkling, or turbinado sugar before baking for that bakery-style golden crunch and a little extra sweetness.
- Always let your filling bubble before pulling the pie from the oven - that's how you know it's perfectly thickened.
More Southern Dessert Recipes You'll Love


Prefer a nostalgic, old-fashioned twist? My classic Old-Fashioned Pear Pie (Just Like Grandma Made), featured on Grits and Pinecones, shares the same cozy flavor but with a more traditional touch.
A big thank-you to our sweet friends, Mary and Rick Carroll, who keep us stocked with fresh pears from their farm each season. Their kindness (and those pears!) make this pie a true Southern blessing.
Bringing It all Together
This Easy Pear Pie with Fresh Pears is a love letter to seasonal fruit and simple Southern desserts. Let the pears shine, keep the crust rustic, and fill your kitchen with the cozy scent of cinnamon and sugar.
If your home smells like fall after this pie bakes, you've done it right.
Now it's your turn - bake it, share it, give it a star rating, and tell me how it turned out in the comments!

Easy Pear Pie with Fresh Pears (Old-Fashioned Flavor Made Simple)
Ingredients
- 6 cups peeled and thinly sliced fresh pears, about 6-7 medium-sized pears
- ¾ cup granulated sugar
- 2 tablespoons all-purpose flour
- ¾ teaspoon ground cinnamon
- ¼ teaspoon kosher salt
- ⅛ teaspoon ground nutmeg
- 1 tablespoon fresh lemon juice
- 2 refrigerated or thawed frozen pie crusts
Instructions
- Preheat oven to 425°F.
- Place one crust in an ungreased 9-inch glass pie plate. Smooth out with your fingers so that it covers the bottom and sides of the dish.
- Add the pears, sugar, flour, cinnamon, salt, lemon juice, and nutmeg to a large bowl. Gently stir all ingredients until they are thoroughly mixed. Pour into the prepared pie crust. Spread the filling out evenly.
- Top with the second crust. Gently fold the excess top crust over and under the sides of the bottom crust and press the edges together to seal. You should have an even double roll of pie crust around the top.
- To flute the pie crust, use one finger to push the inner edge out while pinching the outer edge in with the thumb and index finger of the other hand. Repeat around the entire edge of the pie. Alternatively, you can take a fork and press the tines around the entire edge of the pie to seal the crust.
- Cut several slits in the top crust. Optional: For a shiny crust, brush the dough with an egg wash and sprinkle with coarse sugar before baking. See notes.
- Bake for 20 minutes. Remove the pie from the oven and place strips of aluminum foil around the edge of the pie crust to prevent it from browning too quickly. Bake for another 20-25 minutes. Cool on a wire rack for at least two hours before serving.
Notes
- Bake the pie on a rimmed baking sheet to catch drips and make cleanup easy.
- Let the pie cool completely before slicing for clean wedges and a set filling.
- Brush the top crust with an egg wash (one egg beaten with a tablespoon of milk) for shine.
- Sprinkle with coarse, sparkling, or turbinado sugar before baking for that bakery-style golden crunch and a little extra sweetness.
- Always let your filling bubble before pulling the pie from the oven - that's how you know it's perfectly thickened.
Nutrition
Practical Southern Cooking shares easy, comforting Southern recipes designed for busy cooks and smaller households. Featuring simple ingredients, make-ahead tips, and creative ways to stretch one meal into two, Sharon Rigsby's recipes celebrate Southern comfort with a side of simplicity, always approachable, flavorful, and perfect for everyday life.


Sharon Rigsby says
This easy pie is best made with fresh firm pears and will remind you of apple pie, in fact if you don't tell anyone, they will probably think they are eating an apple pie.